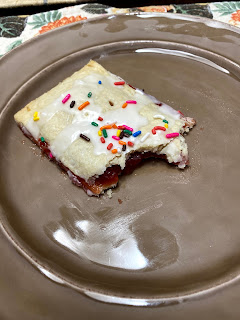
Homemade Pop Tarts
 |
| Way better than store-bought! |
I think it's safe to say that our first summer as a family of four is NOTHING like we envisioned, but we're making the best of it and enjoying our time together. We might not have festivals or outdoor music or vacations, but we're enjoying the outdoors and finding fun projects to do on days when we're stuck at home.
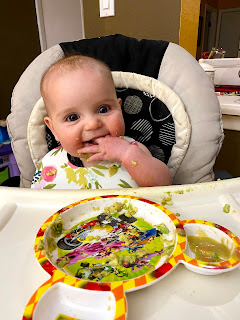
We started introducing solid food to Meredith when she hit the 6-month milestone, and just like the rest of her family, she's a great eater. She seems really enthusiastic about the new flavors and textures, and enjoys the social aspect of sitting at the dinner table with us. She devoured some homemade cinnamon pear puree and mashed sweet potatoes, and like a true Santa Fean, she's all about the avocado.

Ady loves to feed her baby sister I know the guac is extra.
Big sister likes being a helper in the kitchen and we had fun making these homemade pop tarts. I think most healthy people have a weakness when it comes to junk food, and pop tarts are definitely mine. These homemade ones are a hundred times better than the ones that come in a box. They're good enough to count as dessert (but of course I still ate them for breakfast). Enjoy!
Homemade Pop Tarts
(from Cooking Classy)
Ingredients:
For the pastries:
2 cups + 2 Tablespoons flour
1 tsp salt
1 tsp sugar
1 cup unsalted butter, chilled and cut into small cubes
4-5 Tablespoons ice water
3/4 cup strawberry preserves (or any flavor of your choice)
For the icing:
1 cup powdered sugar
2 Tablespoons half and half
1/4 tsp vanilla extract
Sprinkles
Instructions:
1. In a food processor, pulse together the flour, salt and sugar. Add the butter, a few cubes at a time, and pulse until mixture resembles damp sand. Add water, 1 Tablespoon at a time, and pulse until mixture comes together in clumps. Gather dough into a ball and divide in two. Shape each into a disk, then cover with plastic wrap and chill for one hour.
2. Line a large baking sheet with parchment paper. Roll each disk out on a floured surface into a 13-inch by 11-inch rectangle, then trim the edges to make a 12-inch by 10-inch rectangle. Cut each large rectangle into eight 5-inch by 3-inch rectangles. (You will have a total of 16 rectangles from the two discs.)
3. Arrange 8 rectangles spaced apart on the baking sheet, spread 1 1/2 Tablespoons of jam in the center, and top with another rectangle. Seal the edges of the pastries, then poke the top a few times with a toothpick. Cover and freeze for at least 2 hours.
4. Bake frozen tarts for 25-30 minutes at 375 degrees F, turning the baking sheet halfway through. Allow to cool before icing.
5. In a mixing bowl, whisk the icing ingredients together, adding more half and half if needed. Spread over the tops of the cooled tarts, then add sprinkles or decorations of your choice. Allow glaze to set at room temperature. Enjoy!
 |
| Mixing up the pastry dough |
 |
| Making rectangles from a disk was harder than expected |
 |
| My assistant pastry chef seals the edges of the pastries |
 |
| Done! |
I think I want to try these Cinnamon Pop Tarts next!


Comments
Post a Comment